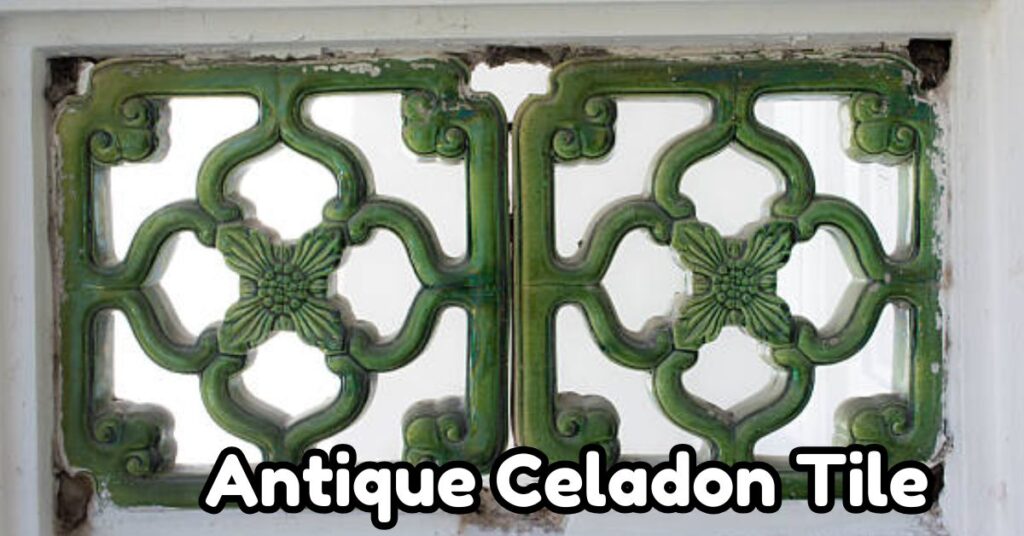
Stepping into the world of antique celadon tile is like opening a door to centuries of artistry and craftsmanship. These delicate treasures, known for their distinctive jade-like glaze and subtle crackle patterns, represent some of the most coveted ceramic artifacts among collectors and interior designers alike. Whether you’ve recently acquired a collection of these historical gems or are considering incorporating antique celadon tile into your home renovation project, understanding how to properly restore and care for these pieces is essential to preserving their beauty and value.
As someone who has spent decades working with historical ceramics, I’ve witnessed the remarkable transformation that properly restored celadon tiles can bring to a space. However, I’ve also seen irreparable damage caused by well-intentioned but misguided restoration attempts. This comprehensive guide aims to walk you through everything you need to know about evaluating, restoring, and maintaining antique celadon tile, ensuring these cultural treasures continue to tell their stories for generations to come.
Understanding the Legacy of Celadon Ceramics
Before diving into restoration techniques, it’s important to appreciate what makes antique celadon tile so special. Celadon refers to a family of ceramics characterized by their jade-green glaze, which ranges from pale sea-foam to deep olive tones. The production of celadon wares originated in China during the Eastern Han Dynasty (25-220 CE) before spreading throughout East Asia, becoming particularly associated with Korean and Thai pottery traditions.
The distinctive color comes from iron oxide in the glaze that undergoes a chemical reaction during firing in a reduction atmosphere. What makes antique celadon tile particularly valuable is the craftsmanship involved—the complex firing techniques, the signature crackle patterns (known as “crazing”), and the historical significance of these pieces as cultural artifacts.
Historical Significance and Regional Variations
Antique celadon tile varies significantly depending on its origin:
- Chinese celadon typically features more elaborate designs and a bluish-green tint
- Korean celadon (known as Goryeo celadon) is prized for its elegant simplicity and distinctive blue-green color resembling fresh jade
- Thai celadon often displays more pronounced crazing and a warmer, more yellowish-green hue
- Japanese celadon tends toward minimalist designs with subtle tonal variations
Understanding your specific antique celadon tile’s origins will inform proper restoration approaches and help you appreciate its unique characteristics.
Evaluating Your Antique Celadon Tile
Before beginning any restoration work, careful assessment is essential. Not all antique celadon tile requires extensive restoration—sometimes minimal intervention preserves both value and authenticity.
Age and Authenticity Markers
Authentic antique celadon tile will typically display several identifying characteristics:
- Glaze Characteristics: Genuine antique celadon has depth and translucency to its glaze, with subtle variations in color rather than a flat, uniform appearance
- Base Material: Turn the tile over—authentic pieces often have unglazed sections revealing stoneware that ranges from light gray to reddish-brown
- Crazing Patterns: Natural crazing develops over time as microscopic cracks form in the glaze; these should look organic rather than manufactured
- Weight and Density: Authentic antique celadon tile feels substantially heavier than modern reproductions
- Firing Marks: Look for subtle imperfections from traditional firing methods—small pinpricks, kiln dust specks, or gentle warping
Common Damage Types in Antique Celadon Tile
When evaluating restoration needs, identify which issues your antique celadon tile displays:
- Surface Soiling: Accumulated dirt, grime, or residue from previous installations
- Staining: Discoloration from minerals, metals, or organic matter
- Glaze Damage: Chips, flaking, or areas where glaze has worn away
- Structural Cracks: Fractures that compromise the tile’s integrity
- Previous Repairs: Often visible as darkened adhesive lines or mismatched fillers
- Efflorescence: White, powdery mineral deposits from water damage
Document all damage with photographs before beginning any restoration work. This creates a valuable record of the tile’s condition and helps track restoration progress.
Essential Tools and Materials for Celadon Tile Restoration
Proper restoration requires specialized tools and materials that won’t harm delicate glazes or historical authenticity.
Basic Restoration Kit
For most antique celadon tile restoration projects, gather:
- Soft natural bristle brushes (various sizes)
- Dental picks and wooden skewers for gentle debris removal
- Distilled water (tap water minerals can damage antique glazes)
- pH-neutral conservation-grade cleaning agents
- Unbleached cotton swabs and pads
- Acid-free tissue and archival paper
- Soft microfiber cloths
- Plastic containers for soaking solutions
- Low-tack painter’s tape for protecting vulnerable areas
- Magnifying glass for detail work
- Proper lighting (daylight-balanced LED is ideal)
- Nitrile gloves to prevent oils from transferring to tiles
Specialized Materials for Advanced Restoration
For more extensive damage, consider:
- Conservation-grade adhesives (reversible types preferred)
- Color-matched epoxy fillers for larger gaps
- Artist-grade pigments for touch-up work
- Fine-grade polishing compounds
- Consolidants for fragile sections
- Archival sealants for completed restorations
Invest in quality materials—using inappropriate products can cause permanent damage to your antique celadon tile.
Cleaning and Surface Restoration Techniques
The first phase of restoration typically involves careful cleaning to reveal the true condition of your antique celadon tile.
Initial Cleaning Approach
- Dry Cleaning First: Begin with gentle dry brushing using soft natural bristle brushes to remove loose dirt and debris
- Dust Removal: Use controlled air puffs (never compressed air) to dislodge particles from crevices
- Test Areas: Before applying any moisture, test cleaning solutions on an inconspicuous area
- Gradual Moisture Introduction: Begin with distilled water slightly dampened swabs rather than soaking
Dealing with Stubborn Dirt and Residues
For more persistent soiling on antique celadon tile:
- Gentle Soaking: For detached tiles, create a bath of distilled water with a few drops of pH-neutral conservation cleaner
- Poultice Methods: For installed tiles or stained areas, apply a conservation-grade poultice to draw out embedded dirt
- Controlled Cleaning: Work in small sections, moving from least to most soiled areas
- Proper Drying: Allow tiles to dry completely between cleaning sessions in a temperature-controlled environment
Addressing Stains Without Damaging Glaze
Different stains require specific approaches:
- Iron stains: Oxalic acid-based poultice (extremely diluted and tested first)
- Organic stains: Enzymatic cleaners designed for historical ceramics
- Efflorescence: Distilled water compresses followed by controlled drying
- Oil-based stains: Absorbent materials like diatomaceous earth applied dry
Structural Repairs for Antique Celadon Tile
When your antique celadon tile has structural damage, repairs require patience and precision.
Crack Stabilization
For hairline cracks that don’t compromise structural integrity:
- Clean the crack thoroughly using fine brushes and alcohol
- Apply a conservation-grade consolidant to prevent further separation
- Consider whether the crack is stable enough to leave untreated (sometimes minimal intervention preserves more value)
Fragment Reattachment
For broken antique celadon tile:
- Perform a dry-fit to ensure proper alignment before applying adhesive
- Use reversible conservation adhesives specifically formulated for ceramics
- Secure fragments with low-tack tape or sand supports during curing
- Remove excess adhesive immediately before it dries
- Allow extended curing time in a stable environment
Gap Filling and Reconstruction
For missing sections:
- Create a template of the missing area
- Prepare conservation-grade filler matched to the body color
- Apply in thin layers, building up gradually
- Shape and texture while semi-cured to match surrounding areas
- Consider whether to recreate glaze effects or leave the repair visible as part of the tile’s history
Glaze Restoration and Protection
The glaze is what gives antique celadon tile its distinctive character, making its preservation critical.
Stabilizing Flaking Glaze
When glaze begins separating from the body:
- Inject conservation-grade consolidant beneath loose sections using fine needles
- Apply gentle pressure with soft materials until the adhesive cures
- Clean excess consolidant immediately to prevent staining
Ethical Approaches to Glaze Touch-ups
While complete reglazingis rarely appropriate for authentic antique celadon tile, minimal touch-ups may be necessary:
- Use conservation-grade tinted waxes for minor chips
- Apply translucent conservation finishes that mimic glaze depth
- Consider the “honest restoration” approach where repairs remain subtly visible upon close inspection
Protecting Restored Glaze
Once restoration is complete:
- Apply a conservation-grade protective coating if appropriate for your specific tile type
- Ensure any coating is reversible and won’t yellow over time
- Document all materials used for future conservators
Installation and Display Considerations
How you display or install your antique celadon tile significantly impacts its longevity.
Creating Stable Mounting Systems
For wall displays:
- Use museum-quality mounting systems that distribute weight evenly
- Avoid adhesives directly on tile surfaces—instead, create custom frames or brackets
- Incorporate silicone buffers to prevent direct contact with hard surfaces
- Ensure all mounting materials are acid-free and non-reactive
Environmental Controls for Longevity
Your antique celadon tile will last longer in controlled conditions:
- Maintain stable humidity (40-60% relative humidity is ideal)
- Avoid direct sunlight which can fade glaze colors over time
- Keep temperature fluctuations minimal (sudden changes promote crazing)
- Consider museum-grade display cases for rare specimens
Integrating Antique Celadon Tile in Modern Spaces
When incorporating these historical pieces into living spaces:
- Avoid high-moisture areas like shower walls for truly valuable antique tiles
- Create focal point installations where tiles won’t be touched regularly
- Consider shadowbox framing for individual showcase pieces
- Use LED lighting that doesn’t generate heat or UV radiation
Ongoing Care and Maintenance
Proper care extends the life of your restored antique celadon tile indefinitely.
Seasonal Maintenance Schedule
Develop a calendar for regular care:
- Weekly: Gentle dusting with soft natural bristle brushes
- Monthly: Inspection for new damage or environmental issues
- Quarterly: Detailed photography to track condition changes
- Annually: Professional assessment for valuable collections
Handling and Cleaning Guidelines
Establish proper protocols:
- Always wear clean cotton or nitrile gloves when handling tiles
- Never use commercial cleaners or abrasives
- Avoid wet cleaning when simple dusting will suffice
- Keep detailed records of any cleaning performed
Monitoring Environmental Threats
Be vigilant against common risks:
- Install humidity monitors in display areas
- Watch for signs of pest activity near organic mounting materials
- Check for water intrusion or leaks near installations
- Monitor for vibration damage in homes near transit lines
Working with Conservation Professionals
Some restoration work is best left to experts who specialize in antique celadon tile.
When to Call in the Experts
Consider professional help when:
- Your tile has significant historical or monetary value
- There’s substantial structural damage requiring specialized equipment
- Previous restoration attempts have caused complications
- You’re uncertain about the tile’s age or composition
- You need authentication for insurance or resale purposes
Finding Qualified Ceramic Conservators
Look for professionals with:
- Training in archaeological or historical ceramics
- Membership in professional conservation organizations
- Experience specifically with East Asian ceramics
- A portfolio of celadon restoration projects
- References from museums or serious collectors
Collaborative Restoration Approaches
The best results often come from:
- Detailed consultation before work begins
- Clear documentation of proposed treatments
- Approval stages throughout the restoration process
- Knowledge transfer so you understand all procedures
- Comprehensive care instructions upon completion
Preserving Historical Context and Provenance
Beyond physical restoration, preserving the story of your antique celadon tile adds tremendously to its value.
Documenting History and Origin
Research and record:
- Manufacturing period and location
- Original usage (architectural, decorative, functional)
- Notable previous owners or locations
- Historical events connected to the piece
- Cultural significance within its tradition
Creating a Conservation Portfolio
Maintain records including:
- Detailed before, during, and after photographs
- Written condition reports
- Materials and techniques used in restoration
- Contact information for conservators involved
- Receipts and certificates of authenticity
Ethical Considerations in Restoration
Always balance:
- Preserving historical integrity versus aesthetic enhancement
- Disclosure of restoration work to future owners
- Appropriate level of intervention for the tile’s significance
- Cultural sensitivity to the tile’s origins
Frequently Asked Questions About Antique Celadon Tile
How can I tell if my celadon tile is truly antique?
Authentic antique celadon tile typically displays several key characteristics: uneven coloration with depth to the glaze, natural crazing patterns that have developed over time, signs of handcrafting rather than machine production, and an unglazed reverse side that has naturally aged. Consider having significant pieces evaluated by an Asian ceramics specialist, as modern reproductions have become increasingly sophisticated.
Can I use my antique celadon tile in a bathroom renovation?
While technically possible, installing genuine antique celadon tile in high-moisture environments like bathrooms significantly risks damaging these historical pieces. The constant humidity changes, cleaning chemicals, and potential for physical impact make bathrooms particularly hostile to antique glazes. If you’re determined to incorporate this aesthetic, consider using modern celadon-inspired tiles in wet areas and reserving your authentic antique celadon tile for decorative wall installations in drier parts of the room.
What causes the crackle pattern in celadon glazes?
The distinctive crazing or crackle pattern in antique celadon tile develops because the glaze and clay body have different contraction rates during cooling after firing. Traditional celadon was intentionally formulated to create this effect, which artisans considered aesthetically desirable. Over centuries, these tiny fissures may darken as minerals and oils penetrate them, creating the distinctive webbed appearance prized by collectors. Not all crazing indicates damage—it’s often an authentic characteristic of properly-aged celadon.
How often should I clean my antique celadon tile installation?
Antique celadon tile requires minimal cleaning—excessive moisture can damage aged glaze and potentially loosen historically significant patina. Limit routine maintenance to gentle dusting with soft brushes weekly, and only perform wet cleaning (using only distilled water on cotton swabs) when absolutely necessary. Always test any cleaning approach on an inconspicuous area first, and avoid commercial cleaning products entirely.
Is it possible to repair a severely damaged antique celadon tile?
Even severely damaged antique celadon tile can often be stabilized and partially restored by qualified ceramic conservators. However, extensive reconstruction may significantly impact both monetary and historical value. For rare pieces, conservation approaches typically focus on stabilizing existing materials rather than comprehensive visual restoration. The appropriate approach depends on the tile’s historical significance, intended use, and your personal restoration philosophy.
Conclusion
The journey of restoring and caring for antique celadon tile connects us directly with centuries of ceramic tradition and craftsmanship. These distinctive pieces, with their characteristic jade-like glaze and historical significance, deserve thoughtful conservation approaches that balance preservation with functionality. Whether you’re a serious collector, a homeowner incorporating historical elements into your space, or a design professional working with period materials, understanding the unique properties of celadon glazes and appropriate restoration techniques ensures these cultural treasures endure.
Remember that each antique celadon tile tells its own story through subtle variations in color, crazing patterns, and manufacturing techniques. The most successful restoration approaches honor this individuality rather than attempting to create uniformity. By establishing proper care routines, creating appropriate display environments, and knowing when to seek professional assistance, you become part of the continuing legacy of these remarkable artifacts.
As interest in historical Asian ceramics continues to grow, properly restored and authenticated antique celadon tile represents not only a connection to artistic traditions but potentially a sound investment. More importantly, through conscientious stewardship of these pieces, you help preserve cultural heritage for future generations to study and enjoy. The time, patience, and care invested in proper restoration and maintenance practices ensures that the subtle beauty of celadon will continue to bring its distinctive serenity to spaces for many more centuries to come.